
One of the “mod” parts of my resto-mod 67 is the instrument cluster. Since it started pretty low end, it didn’t have anything useful in the dash. Even though it had a 3 speed, it didn’t have a tachometer. Part of fixing that, I went with all modern gauges that look a little nicer, with newer technology.
Here was my starting point:
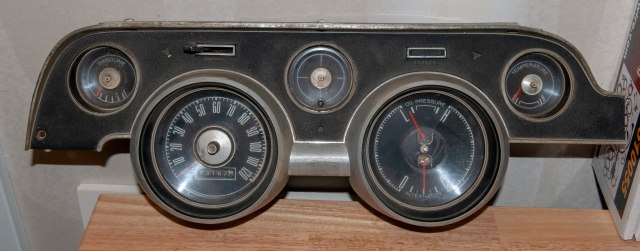
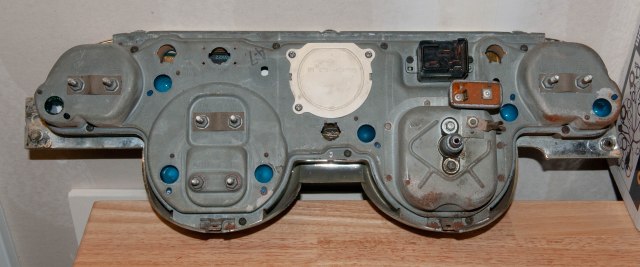
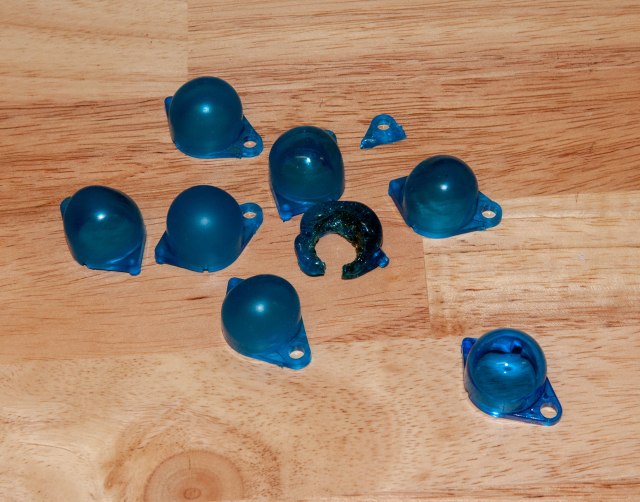
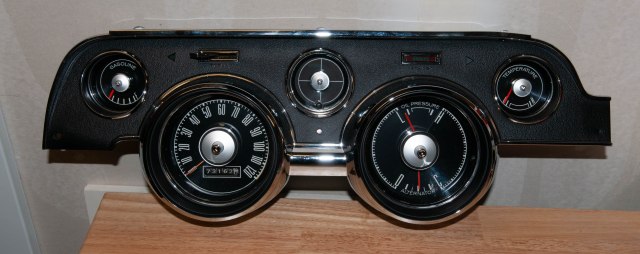
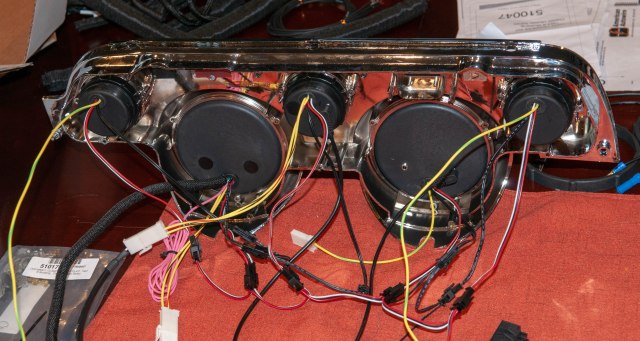
It’s a plastic bezel that I have to assume at one point might have been chrome color, but has since all worn off and faded. For the original, the gauges are all attached to the metal back plate, including the wiper switch which is over the speedometer. For dash lights, there are 7 little plastic light domes behind the gauges which house bulbs entered from the back on the wiring harness.
At some point, I thought it would be cool to rebuild the original with a new bezel and lenses to turn it into a garage wall ornament/art. I plan on figuring out the wiring to get the dash lights working at some point too. Like a neon beer sign, but cooler. So I started replacing things.
The original has lenses that I found replacements for, and there are several bezel manufacturers. I didn’t see replacements for the retainer rings on the back of the lenses, or the neat little cardboard tubes that look like eye pieces for a telescope, used to prevent light bleed on blinkers, brake, and brights lights. I also didn’t find a screw set, but I picked those up at the local hardware store for my new bezel (6 x 1/2″). The other parts are not used with new gauges.
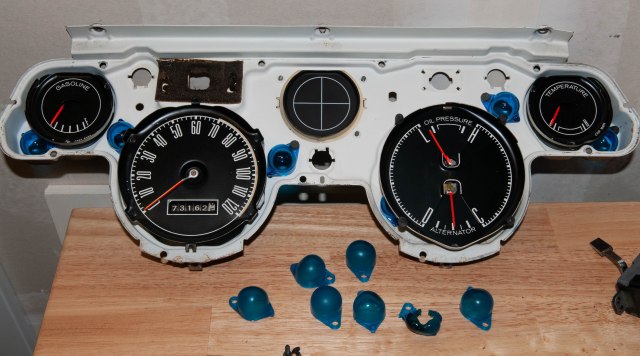
It was a bit annoying due to limited clearance on the blue light domes. It got worse trying to get to the retaining screw when the original was melted like a few were. Below, the bottom right blue dome is a replacement, where all of the rest were originals. I don’t know if the transparency is a remanufacture change, or just time. The melting is not an original feature though.
Other than a little time consuming, there were no issues. It went back together pretty easy. The original backing went on the reproduction bezel without an issue.
If I was going back to original, that would be the end of the story. Since I’m not, this gets put aside, and I don’t have to mess with the wiring until I am ready to put it on the wall.
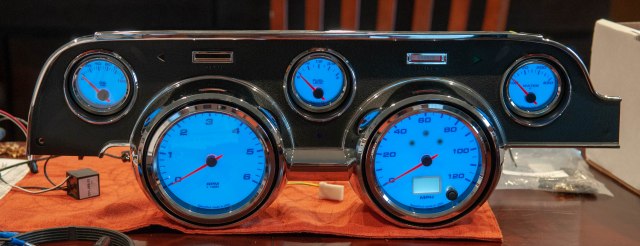
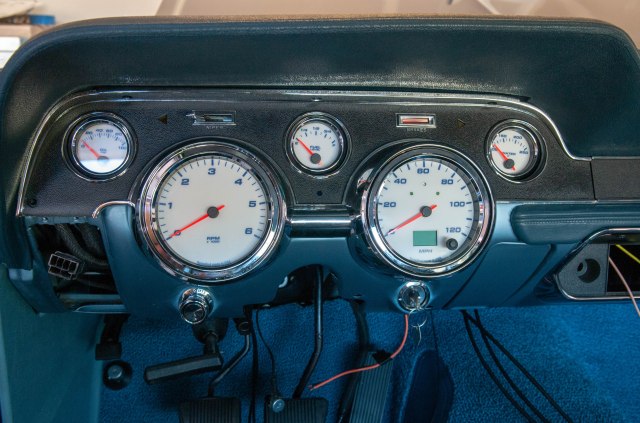
Distractions aside, plus a little more experience in how things were originally, I went back to the task at hand of getting gauges in my car. I ordered Speedhut custom gauges. I wanted the white background with some complementary colored lettering/numbering for the car, so I went with a dark blue. The blue LED lighting is also a new look but with some retro for the old blue bubble light look. I also went with a favorable font and bright chrome trim to match the bezel look.
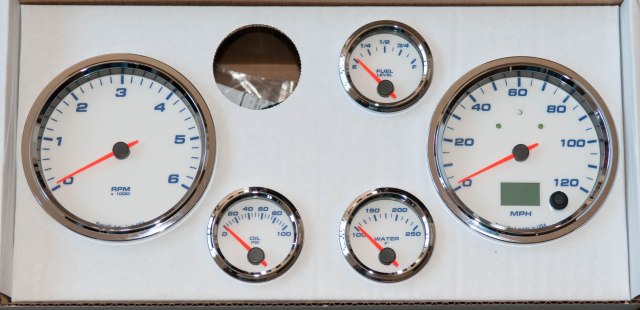
I had some choices to make with which gauges to use. They did offer a few combined gauges but I didn’t like how any of them looked. That meant I was set with a speedometer and a tachometer for the big dials, leaving 3 small dials to fill. Top down, I must have a fuel gauge. I really should have a water and oil temp gauge. That means my battery amperage is going to have to remain a mystery.
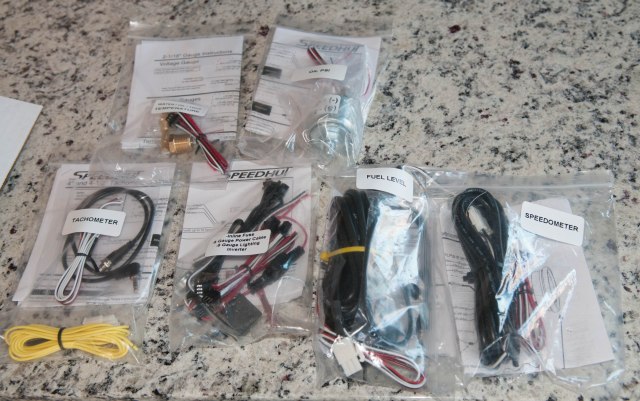
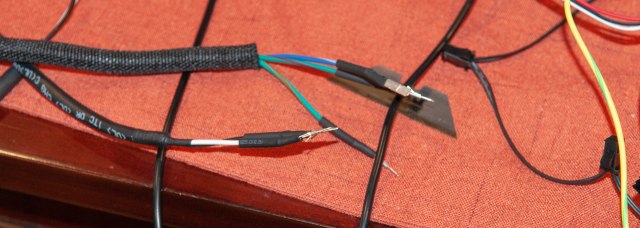
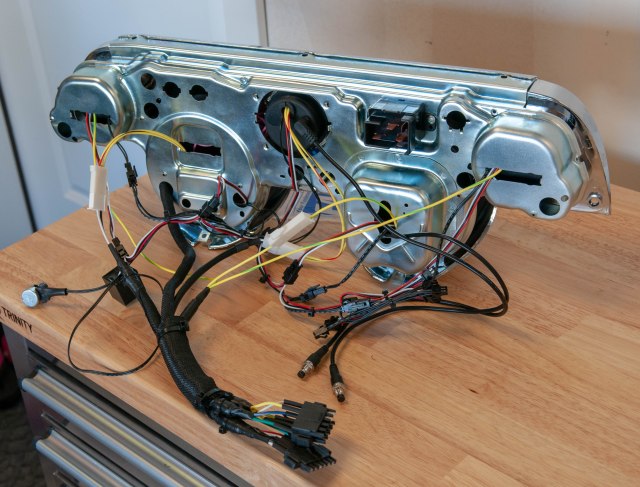
This kit also came with a pile of wires. Each gauge looked like it included enough wire to go all the way to the sending unit, even if it was in the trunk. It also included the sending units. With the new programmable gauges, a couple came with programming cables as well. Building a new wiring harness attachment is going to be fun.
From here, I started fitting gauges and trying things out. Each of the small gauges fit in the small openings perfectly. Each gauge has a threaded exterior on the back and there is just a plastic retaining ring to screw on and hold it in place, sandwiching in the bezel. The 2 larger gauges were slightly too large for the original bezel, so they seated slightly closer to the driver and needed to be epoxied in place. Not super excited about that, but it looks pretty good. This left all of the gauges attached to the bezel rather than the metal backing like the original. I thought I could get away without the backing plate all together, but its required for mounting it to the car as well as a place to mount the wiper switch. With the gauges set (but not yet epoxied) I started working on wiring.
With things in place, I wanted to make sure things worked before adding it to the car. To do that, I picked up a 12 volt lantern battery and wired it in. Both smiles and relief when things lit up.
I went ahead and cut all the ends and prepped them for the American Autowire harness plug assembly. It looks like I just need to make sure the car side lines up with the bezel side, but since both are hand made and not following anything original, I don’t need to follow any pattern. I put the backing plate on, which fit pretty well with the Golden Legion bezel. With the difference in original gauges and wiring, the new wires just kind of come out wherever. Slightly worried about the sharp edges, but don’t have a solution immediately at hand.
From here, I have to prep the dash wiring harness clip and put the connectors on each side with a matching pattern. I just went with the AAW fan out diagram and started on the left. Since the wires have to fit into 2 different connectors, this wasn’t the bet thought out plan as the split ended up being between the left and right directional which are wrapped together. It just means I have to make one big bundle.
From here, all that’s left is fitting it in the car. It’s a snug fit and I didn’t want to screw it all in until I get a battery in and can check all of the gauges and lights. But it’s in there pretty tight, so I’m not worried about it going anywhere while I finish up and button things down (like putting the steering wheel back in, again).
Still on the project list is cleaning up the heater controls and filling that gap, along with the one on the other side for the stereo. All de-prioritized while I focus on things required to get it started for the first time.

Great blog!
I am considering doing the same thing on my 68 which already has an AAW harness. I am confused…did you re-use your original bezel? If so what size were your large gauges? I believe original large gauges were 5.0″ but Speedhut only makes 4.5″ or 5.5″? So which did you use to fit the bezel?
Thanks,
Curt
LikeLike
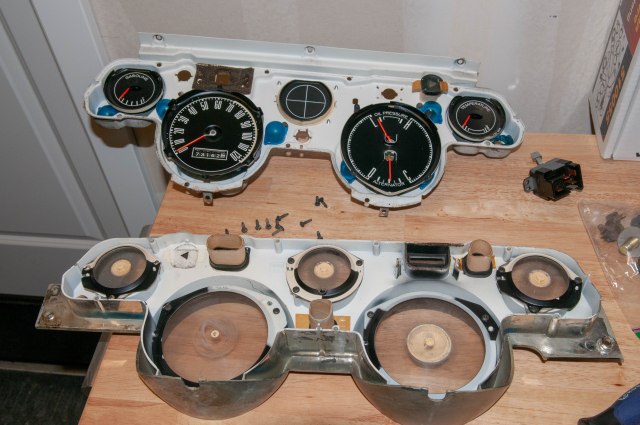
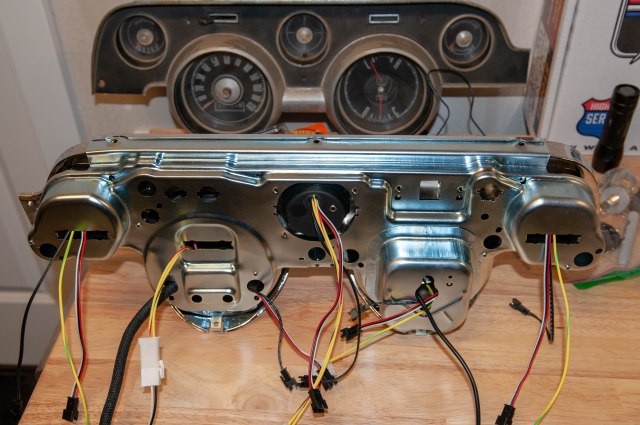
The original bezel was pretty warn, but I did get one of the reproduction bezels from NPD. I actually got 2 since I dremmel’d up the first one trying to see if I could get the big gauges to seat as good as the small ones. No dice. I also rebuilt the original gauge cluster in a new bezel to hang on my wall with some other parts like the original gas cap.
In the end, the small gauges (2 1/16) fit well as designed with the threaded retainer ring on the back of the bezel. The larger (4 1/2) don’t set all the way back so they are epoxied in. You can see in the picture from the back how the larger gauges don’t come far enough out to thread the retaining ring on like the smaller ones do. Not my favorite but it ended up looking pretty good. It does push the face of the big gauges closer to the driver though. You can tell if you compare the rebuilt original to the one with the new gauges.
LikeLike
Ah, got it now, thanks. Good explanation. By the way, nice taste in color, we painted our 68 virtually the same blue.
LikeLike
Reblogged this on Automotive American and commented:
Very interesting post from Brad on restoring his Mustang instrument cluster.
LikeLike